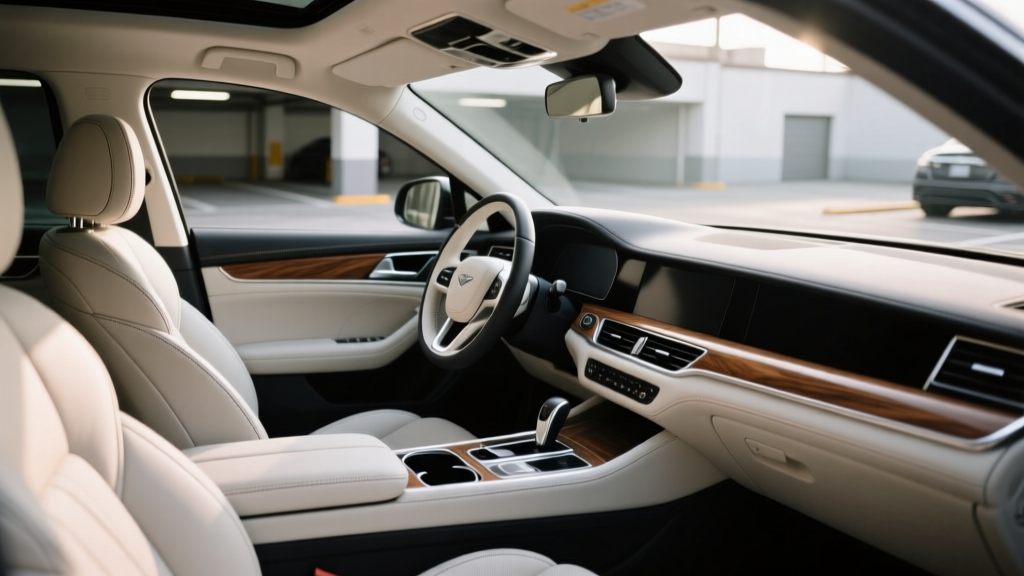
Car Interior Detailing Upgrade: Pro Tips (2026)
If you?ve already mastered the basics?vacuuming, wiping surfaces, and keeping trash under control?this is where interior detailing gets seriously rewarding. The difference between a ?clean car? and a ?professionally detailed interior? usually comes down to technique, tool choice, and the order you do things in. Part 2 focuses on upgrading your process so you can get better results with less effort, fewer streaks, and longer-lasting protection.
This matters for more than looks. Interior materials are sensitive to heat, UV exposure, body oils, and harsh cleaners. The wrong product can cause cloudy plastics, dried-out leather, sticky dashboards, or stained headliners. The right methods preserve resale value, prevent premature wear, and make the cabin a more comfortable place to spend time?whether it?s a daily commute or a weekend track day.
Think of this guide as moving from ?good cleaning? to ?repeatable professional results.? You?ll learn smarter tool upgrades, deeper cleaning techniques, and protection steps that keep everything looking factory-fresh.
What ?Upgrading? Your Interior Detailing Really Means
Upgrading isn?t buying every gadget on the shelf. It?s improving three things:
- Efficiency: Less time re-cleaning the same areas and fewer missed spots.
- Safety: Using products that match the surface so you don?t damage trim, screens, or coatings.
- Durability: Adding protection so the interior stays clean longer and resists UV, stains, and body oils.
A Pro-Level Interior Detail Has a Clear Workflow
- Dry work first (vacuuming, compressed air, brushing)
- Targeted cleaning (fabric, leather, plastics)
- Finishing and protection (UV protectant, leather protection, fabric guard)
- Final inspection (lighting checks, glass, touch-up)
Tool Upgrades That Make the Biggest Difference
You can get a strong pro result without a full detailing cart. These upgrades provide the best return on money and space.
1) High-Quality Vacuum Setup
- Shop vac (5?8 gallon) with strong suction: Great for sand, pet hair, and deep carpet debris.
- Crevice tools and mini brush heads: Essential for seat rails, console seams, and vents.
- Pet hair tool: Rubber or pumice-style tools work wonders on carpets and cloth seats.
2) Compressed Air or Electric Air Blower
This is a real ?pro move? for modern interiors with tight seams.
- Blows debris out of seat tracks, window switches, stitching, and vent fins
- Speeds up drying after cleaning
- Helps prevent drips from reappearing later
3) Interior Brush Set (Soft + Medium)
- Soft bristle: Piano black trim, instrument clusters, screens (lightly), and delicate plastics
- Medium bristle: Grained plastics, door cards, rubber floor mats, textured trim
4) Microfiber Towels: Use the Right Types
- Short nap: Cleaning plastics, leather wipe-down, final buff
- Waffle weave: Interior glass and mirrors
- Plush: Final touches on glossy trim (use clean towels only)
5) Extractor or Steamer (Optional, But Powerful)
If you deal with kids, pets, or frequent spills, one of these is worth it.
- Extractor: Best for deep fabric cleaning (carpets/cloth seats). Pulls dirty water out.
- Steamer: Great for sanitizing and loosening grime in crevices, but requires careful technique.
Step-by-Step: Pro Interior Detailing Workflow (Upgrade Edition)
Step 1: Reset the Cabin (2?5 minutes)
- Remove all trash, personal items, and floor mats.
- Slide seats fully forward/back to expose rails and carpet edges.
- Open doors (and trunk if needed) for ventilation and light.
Real-world tip: Keep a small bin in your garage for ?car items? (chargers, sunglasses, coins). You?ll detail faster and avoid losing anything.
Step 2: Dry Clean First (Vacuum + Air + Brush)
- Start with compressed air/blower: vents, seat seams, cupholders, shifter trim, and seat tracks.
- Vacuum top to bottom:
- Seats and seams
- Carpet edges near center console
- Under seats and rails
- Trunk cargo carpet if applicable
- Use a brush while vacuuming for carpets and cloth seats to lift embedded dirt and hair.
Pro detailer habit: Vacuum twice?first pass to remove bulk debris, second pass after brushing to get what you loosened.
Step 3: Clean Plastics, Vinyl, and Trim Without Streaks
Most interiors respond best to a gentle all-purpose cleaner (APC) diluted properly, or a dedicated interior cleaner. Start mild, then increase strength only where needed.
- Spray cleaner onto a microfiber towel (not directly onto the dash) to prevent overspray on glass and screens.
- Wipe surfaces in sections:
- Dashboard
- Door panels and armrests (high body-oil zones)
- Center console and cupholders
- Use a soft brush for textured plastics and seams, then wipe residue with a clean towel.
- Finish by buffing with a dry microfiber to reduce haze.
Step 4: Tackle Sticky, Shiny, or Greasy Interior Areas
Some areas get ?mystery shine? from skin oils and old dressings. Here?s how to fix it without damaging trim:
- Steering wheel (leather or synthetic): Use a dedicated leather/surface-safe cleaner. Agitate gently with a soft brush, then wipe until the towel comes away clean.
- Armrests and door pulls: These often need a second pass. Use a damp microfiber after cleaning to remove any leftover residue.
- Rubber pedals and kick panels: Medium brush + cleaner, then wipe dry for a factory matte look.
Step 5: Leather Seats?Clean, Then Protect
Modern coated leather needs a different approach than older, uncoated hides. Most vehicles today have a protective topcoat, so you?re cleaning the coating?not soaking the leather.
- Vacuum seams first to avoid dragging grit across the surface.
- Apply leather cleaner to a microfiber or soft brush.
- Work in small sections (seat base, bolsters, backrest).
- Wipe dry and inspect. Repeat on high-contact areas like bolsters.
- Apply a leather protectant for UV resistance and reduced dye transfer (especially on light interiors).
Real-world example: If you wear dark jeans, the driver seat bolster often picks up blue dye. A good leather protectant makes this easier to wipe away before it becomes permanent staining.
Step 6: Fabric Seats and Carpets?Spot Treat or Deep Clean
For cloth interiors, the upgrade is learning when to spot clean versus extract.
- Spot cleaning: Best for small spills and isolated stains. Use a fabric cleaner, agitate lightly, blot with microfiber.
- Extraction: Best for lingering odors, heavy staining, and salt/sand buildup. Use minimal water and multiple vacuum passes to avoid soaking foam underneath.
- Pre-treat stains with fabric cleaner.
- Agitate with a soft upholstery brush.
- Extract or blot, then repeat if needed.
- Speed drying with airflow or a blower; leave windows cracked if safe.
Step 7: Headliner and Pillars?Clean Carefully
Headliners are easy to damage because the adhesive can loosen if you soak it.
- Use minimal product: spray onto microfiber, not the headliner.
- Blot and gently wipe?no heavy scrubbing.
- For stubborn spots, multiple light passes beat one aggressive pass.
Step 8: Interior Glass and Screens?Crystal Clear Without Damage
- Glass: Use an automotive glass cleaner and a waffle weave towel. Clean in two directions (horizontal then vertical) to spot streaks quickly.
- Screens: Use a screen-safe cleaner or lightly damp microfiber with water. Avoid ammonia-based cleaners that can haze coatings.
- Instrument cluster clear plastic: Treat like delicate paint?soft towel only, minimal pressure.
Product Recommendations and Smart Comparisons
Instead of pushing one brand, here?s how to choose products by category so you can match your interior materials and detailing goals.
Interior Cleaner: APC vs Dedicated Interior Cleaner
- APC (diluted): Versatile, cost-effective. Best for durable plastics, rubber mats, kick panels.
- Dedicated interior cleaner: Usually safer and more streak-free on dashboards, door cards, and soft-touch materials.
Recommendation approach: Keep both?use APC for heavy grime, dedicated cleaner for maintenance and sensitive trim.
Leather Products: Cleaner + Protectant vs ?2-in-1?
- Separate cleaner + protectant: More consistent results; better for removing oils before adding protection.
- 2-in-1 products: Convenient for quick upkeep, but may leave residue if overused.
Fabric Protection: When It?s Worth It
- Ideal for families, rideshare drivers, pet owners, and light-colored cloth
- Look for a fabric protectant that doesn?t leave crunchy texture
- Apply after deep cleaning and full drying
Common Mistakes to Avoid (Even Enthusiasts Make These)
- Spraying cleaner directly onto dashboards: Overspray lands on glass, screens, and gauge clusters?hello streaks and haze.
- Using one towel for everything: A towel used on dirty door jambs shouldn?t touch your screen or piano black trim.
- Over-wetting seats and carpets: Can cause mildew odors and water rings. Use minimal moisture and prioritize extraction/drying.
- Shiny dressings on modern interiors: Glossy dashboards reflect in the windshield and attract dust. Aim for a clean, OEM matte finish.
- Ignoring high-touch zones: Steering wheels, door pulls, and seat bolsters need extra attention for truly ?detailed? results.
- Scrubbing headliners aggressively: This can loosen adhesive and create sagging.
Practical Pro Tips for Better Results
- Use inspection lighting: A small LED light reveals dust around vents, streaks on piano black trim, and missed crumbs.
- Work in the shade: Heat bakes cleaner residue onto plastics and glass, making streaks harder to remove.
- Label your towels: ?Glass,? ?Leather,? ?General,? ?Dirty jobs.? This one change prevents most accidental scratching.
- Keep a maintenance kit in the trunk: Microfiber, small interior cleaner, and a mini trash bag = fewer deep details needed.
FAQ: Professional Car Interior Detailing Upgrades
How often should I do a full interior detail vs maintenance cleaning?
Most drivers do well with a light maintenance clean every 1?2 weeks (vacuum + wipe high-touch areas), and a full interior detail every 2?4 months. If you have kids, pets, or a long commute, you may want a deeper clean monthly.
Is steam cleaning safe for car interiors?
It can be, but technique matters. Use low moisture, keep the steamer moving, and avoid lingering heat on screens, delicate plastics, and headliners. Steam is best used to loosen grime in crevices, then wiped away immediately.
What?s the safest way to clean piano black trim without scratching it?
Blow off dust first, then wipe gently with a clean, soft microfiber. Avoid dry wiping if there?s visible dust. A dedicated interior cleaner sprayed on the towel (not the trim) helps reduce friction and marring.
Why does my interior glass look streaky even after cleaning?
Common causes are using too much product, wiping with a damp/dirty towel, or having interior film from plastics and vaping/smoke. Use a waffle weave towel, clean in two directions, and finish with a second dry towel for a final buff.
Do I need a protectant on the dashboard and door panels?
If your car sees lots of sun, yes?UV protection helps prevent fading and drying. Choose a non-greasy, matte interior protectant. Apply lightly and buff to an OEM finish to avoid shine and dust attraction.
What?s the best way to remove odors from carpets and cloth seats?
Start by removing the source (spills, food, pet accidents), then deep clean with extraction if needed. After drying, an odor neutralizer works better than heavy fragrances. If the smell persists, check under mats and under seats for hidden spills.
Next Steps: Build Your Upgrade Plan
If you want immediate improvement, focus on upgrades in this order:
- Better towels + a brush set (fastest quality jump for the money)
- Compressed air or a blower (makes tight interiors dramatically easier)
- Dedicated interior cleaner + leather protectant (better finish, longer-lasting results)
- Extractor or steamer (best for families/pets and deep restoration work)
Pick one upgrade, refine your workflow, and you?ll get that crisp, no-streak, factory-matte finish that makes an interior feel truly ?detailed.?
Want to keep leveling up? Explore more interior care and detailing guides on carinteriormix.com.